HotBliggityblog01

Dec 2, 2015

Unicorn Galore

2nd post of the day!  I decided to make a separate post to keep each one focused on one thing at a time ^-^.

After some trials and errors, I finally have my prints set !

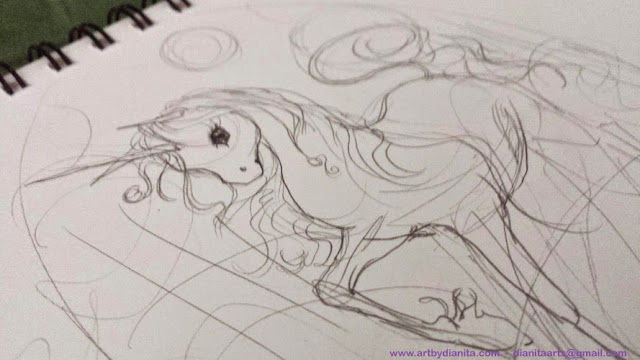
I'm starting with this unicorn, which I love, I made some tweaks to the original scan as it was kinda muted, so I increased a bit the darker parts and tried to achieve a whiter background. It took me longer than I wanted, but I'm happy with the results.

Prints are made with a Canon printer, using Chromalife100+ inks and watercolor rag paper, which is acid free. This are not giclee quality (pigment inks on archival museum quality paper), they're made with love at home with the materials I can afford at the moment =)

If you'd like to purchase, send me an email to dianitaarts@gmail.com!  or through message at www.facebook.com/dianitaart  <3


Jump!
5 in x 7in
Printed on Watercolor rag paper.
Frame not included.
$8 + shipping.
Jump!
5 in x 7in 
Printed on Watercolor rag paper.Hand Embellished with watercolors. (no piece will be the same!).
$12 + shipping.

I also made some stickers! I looove them!  This is the first batch, I used sticker paper (sorry, indoors only! not waterproof!)  and used Crystal Clear spray by Krylon to add a bit of contrast =)  (they're a bit smelly at the start, but it wears away in a few days! (I have one on my sketchbook ^^ for testing)

Jump!
Stickers (M)
4in from horn to tail.
Pack of 2.
$4 + shipping

Jump!
Stickers (Small)
3,5 in from horn to tail.
Pack of 3.
$3 + shipping.

I would love to make tote bags and shirts with this design, but will have to wait until I know about a good supplier that could keep the traditional feeling of this drawing <3


That's it for today posts! (I think!) .  I wanted to focus this day to show what I have worked in, as well as show products for people who showed interest in my facebook posts as well.

Remember!  Christmas rush is about to start, I can't guarantee items will arrive on time for Dec 24th-25th, please, bear with me on this =(.

Also, I will not be able to ship items from Dec 16th to Jan 10th as we're taking a little holiday break.

=)

See you next time! Stay safe and happy!

Dianita
www.artbydianita.com
dianitaarts@gmail.com

Many many little drawings of ponies!

Hi hi!

I have abandoned completely this blog and hubby recently urged me to retake it and make it part of my work, and I'm here to show a bit of what I'm working on, and then, if you want to read more, I'll tell you about this past months =)

First of all, let me start with my personal project. My G1 ponies tribute, in my own style, with a little extra detail. I made cut outs for them, so they can be displayed in a lovely floating frame or with a colored background, whatever you chose!


Blossom
4in x 4in
$20 + shipping
Glitter color gel pen, Sakura micron pen on mixed media paper.

Blue Belle4in x 4in 
$20 + shipping
Glitter color gel pen, Sakura micron pen on mixed media paper.

Butterscotch #14in x 4in 
$20 + shipping
Glitter color gel pen, Sakura micron pen on mixed media paper.

Cotton Candy #1
4in x 4in 
$20 + shipping
Glitter color gel pen, Sakura micron pen on mixed media paper.
Minty4in x 4in 
$20 + shipping
Glitter color gel pen, Sakura micron pen on mixed media paper.

Snuzzle #14in x 4in 
$20 + shipping
Glitter color gel pen, Sakura micron pen on mixed media paper.
Snuzzle #24in x 4in 
$20 + shipping
Glitter color gel pen, Sakura micron pen on mixed media paper.

Butterscotch #2
4in x 4in 
$20 + shipping
Glitter color gel pen, Sakura micron pen on mixed media paper.

Cotton Candy #2
4in x 4in 
$20 + shipping
Glitter color gel pen, Sakura micron pen on mixed media paper.

 As you can see, there are 2 versions of Snuzzle, Butterscotch and Cotton Candy. This was because I had so many ideas that I just went through with, I started Snuzzle and Cotton Candy and then thought in other poses that might work better. I loved both versions and I decided to finish them both.  For Butterscotch #1, she was actually the first version but I closed my drawing pad without noticing a bent corner, right on the left bottom original corner I planned for the drawing. I decided to make it round as it helped a lot to preserve some of the white paper but also get rid of that awful damaged part. and it looks lovely as well! 

All are finished with handmade cut-out backgrounds, using nothing but a sketch pencil and an Xacto knife. This project got delayed mostly because I hurt my wrist making our DotD cut-out paper, I had to use a support band for a week and a half =\ and then give this a bigger rest until my wrist stopped hurting.  Then, we went for a small trip to CA, and resumed work after that =D


If you like them, let me know!


PAYMENT INFO.


Paypal is preferred.
Installments can be arranged via email to dianitaarts@gmail.com


HOLDS:  I will hold an item for you up to 5 days. If I don't receive payment for said items on that time, they will be relisted as available for the next interested buyer without further notice. 


SHIPPING INFO.

Shipping to the USA will be made through First Class, insurance or any other kind of extra safety measure is advised. I cannot guarantee that they will arrive for Christmas, so, plan ahead of time. 

*** I will be not shipping items from December 17th 2015 to January 10th, 2016 ***

****International orders will be ON HOLD until January 10th, 2016  as Christmas rush is about to start and the Mail system gets really busy and it's easier to lose a package. ****

International mail will be made through First Class International. 


Sorry for the little big post!

Will be posting a bit more in a couple minutes for my available prints and sticker sets <3


Commissions and further info, please email me to dianitaarts@gmail.com


Follow my art at:


I hope you like this little drawings !  Have a wonderful day!!!!

Dianita <3


May 16, 2015

"Old as the sky, old as the moon" My tribute to The last unicorn (includes progress photos!)

Hi everyone! How are you?

First, let me show you what you came to see:

the last unicorn tribute
Art: ©2015. Diana Vargas Sampieri (Dianita). All rights reserved.
The last unicorn is property of Peter S. Beagle.


"Old as the sky, old as the moon"

Tribute to The last unicorn
Acrylics on wood.
8in x 6in painted area approximately.
Dianita
2015

$125 usd + shipping.
Sales info: dianitaarts@gmail.com


She was supposed to be participating on Slushbox Gallery show "Nerdcore", but having my wisdom teeth removal surgery scheduled for April 30th distracted me and couldn't develop the idea properly on time. I tried to finish it, but those days after surgery I experienced painful muscle spasms and 2 sleepless and uncomfortable nights in a row. So, yay me.  Hugs to Amanda and all the team from Slushbox, they're amazing!  Go visit their site http://www.slushbox.com and check their current show pieces there!

I documented the process as well as I could, there were some steps I missed and I blame my meds for that!

Enjoy!


1.  The sketch.
the last unicorn tribute
Messy messy!


Just right after surgery, this dumb girl tried to woman up and start doing things right away. Good, you might think. WRONG!  But one thing came up well that day, and it was this final sketch. I had the idea lying around for weeks, but when your doctor sets the day for your first surgery ever you can't really focus on much =|

I didn't spend much time on details here, I knew what I wanted, I aimed for a cute, dynamic pose that could fit on a wood piece I got from Michaels (http://www.michaels.com). I love those wood rounds!

Anyway, my advice to you, sketch your ideas!  Basic sh!t, right?  well, I fail horribly on it. I always go "Leeeeeeroyyyy Jeeeenkeeeeeeeiiiins" when I'm excited and yes, as you imagine, I never finish those pieces because I get lost in the middle of the process. Sooo, plan as much as you can!


2. Sketch to wood.
And, no pic here! =D

But, it's not that hard!

You can check the process here, very very well explained by Jel Ena:

https://www.facebook.com/jel.ena.art/posts/466920026792615


In the video, you can actually see that she takes her sketch and adds a layer of graphite on the back of the sheet.  What I did was that I actually made a photocopy of my sketch, so I didn't have to tear my sketchbook apart, and on the back of the photocopy, I added the graphite with what I think it was a 2B Mars pencil.

If you have a more detailed sketch, you might see that the photocopy will not take many of the details as it should, here it wasn't my case as it was a messy one. But if you find yourself in that situation, you could add one more step:  If you have a lightbox, trace your drawing on a new paper, I would use a normal printer paper if the piece is small or other kind of cheap paper if you prefer. So you will be adding graphite to the back of cheap paper instead of your sketchbook!  (again, basic, but this is not my forte, I swear!)

And, if you don't have a lightbox, go the cheap way like me!  you might have windows at home, right? this will involve to tear your sketchbook page out, but you can carefully store it in a safe location with acid free plastic bags. I use to do this when I have to take this path.  Just tape it on the window, tape your new sheet on top of it and trace, trace, trace!  Of course, daylight hours are a must.

Or, you can go the cheapskate way (not that I've done it *cof cof*), if you have a small desk lamp and a glass table, those make good cheap lightboxes too =P   and if you're very veeery limited and only have a desk lamp... a little bird told me you can tape a sheet of paper to it and then your drawing on top, with the new sheet glued to it.  It's challenging, and sloooow...  but it works  *ehem*  yes, the bird told me so!

White lights are good and the best ones for this from my experience.


Of course, I forgot again to photograph the traced drawing.  But it's not that hard to imagine it, it was closer to the initial sketch =)

This is the transferred image with detailing added:

I wanted to add more and more details T^T  I loved the backgrounds in the movie!
After the sketch is ready, I added a couple layers of Golden Matte Medium. I love this one, it works as a clear sealant that won't add too much grain to the surface, but enough to handle oils or acrylics, or to mix with PearlEx pigments <3

I think I added 2 layers, well thinned down with a bit of water.  After the first layer dried, I added the 2nd, again, thinned down, but not watery!

You let this dry overnight and you're ready =)


3. Blocking background colors.


You can see the actual reference image on my phone.  And that spunky brush on the left! The oldest one I have!

Blocking the colors is something I've learned in this months.  Many, if not all artist I follow does this methodically. Usually, they block colors with acrylics to speed the drying process and then add the last layers with oils.  I will start doing this too, I just need to learn a bit of color theory! 

I happily understood quickly that the base color for the background had to be yellow. YAY!

By looking at the pic, I tried to come up with a practical color palette. This was, from Golden Acrylics Cadmium yellow, burnt sienna, yellow ochre, golden green, dioxazine purple, naples yellow, burnt umber, teal and titanium white.  From Grumbacher Academy I used Hooker's green and Thio Violet.  From Americana, I used Evergreen. Oh, and from Winsor&Newton Galeria, Pale Terracotta.

I took my Golden Acrylics Cadmium Yellow and made a quick wash on the whole background. I left the unicorn out of the yellow washes because I didn't want for the yellow to be too noticeable in the final stages. I'll talk about it later =) .   As you can see on my reference photo, the whole sky is yellow, the trees in the middle are more like ochre and the trees exactly behind the unicorn are like a dark gold/greenish color.  So I decided this was going to be my order.

You can see in the pic that I used a light wash of  Cadmium yellow for the sky. Then started to add a bit of a darker color on the 2nd layer with the yellow ochre mixed still with cadmium yellow.

It doesn't show here, but I tried to cover with 2 or 3 layers of each shade, to hide any imperfection but don't worry too much about it! Remember that this are only your first layers =)


4. Building up.  

YAY! Blurry pic!  just as you wanted to see!  * hides *
And yeah, I don't have a good pic of the next steps. This was the process.


* Kept adding more cadmium yellow to build a solid yellow sky on the background.

* Started to add light washes of color.  For the trees, washes of burnt sienna, sometimes mixed with a bit of yellow ochre to keep the yellow influence of the background. I also built the shadow/light areas of the trees in the right part of the painting.  Ochre + burnt sienna for the medium color areas, pure burnt sienna for the shadows.  The yellow bushes were a mix of cadmium yellow and ochre.  The green bushes I used cadmium yellow + golden green.  For the dark green bush I used phtalo green first from Grumbacher, but it's a bit blueish, so it didn't go well. So I added layers of Hooker's green from Grumbacher Academy.  This worked wonders for the round bush to the right.

* Started to build up texture on the trees using the darker tone I assigned for each one.  Burnt sienna for the bushes on the back and burnt umber for the ones closer to the front.  The tree immediately to the left of the unicorn had also some hints of golden green and ochre while working on it.

* The yellow bushes on the left were the ones I started detailing. It was easier to make this decision as the layers were ready for detailing already in that zone (burnt sienna for shadow, ochre/cadmium yell. for the medium color and pure cadmium yellow for the lighter.  I didn't add white as I wanted the unicorn to be the whiter element there.  So when starting to add the leaves, I used burnt sienna for the darker ones, ochre for the medium ones and naples yellow for the brighter ones on the top.

* For the ground, it was an easy choice. Ochre washes until the surface was evenly covered. Then cadmium yellow for the rounds.

This was how it looked after doing all I mentioned above:

Still in the ugly phase, but something it's certain. A few layers after, it always get better, I promise!


5. The Unicorn and adding more detail.

Again, looks like a magic step here =o


Patience! Building layers takes patience, it's worth it!


I took this photo after doing just a bit of work. Looks like a lot, but I discovered that it's just matter of following steps when it's the time, not rushing anything and enjoying the process.

What I did to reach this stage was:

* Trees in the right: Made sure that the base shape was well defined and lighter/medium/shadow zones were clearly covered (yellow/ochre/burnt sienna).  Then I started to add the leaves. The darker ones in the darker zones, the medium colored ones in the medium shade zone and the lighter ones on the edges where the strong yellow light hits. I played with naples yellow and cadmium yellow on this, no white so far! I also added a different tree with some flowers hanging, I liked that detail on the background of my reference pic and wanted to add it. Same happened here, Darker green in the basic shape, lighter green for the leaves.

*Bush with heart leaves: This was actually a challenge. This one had a green that I could only achieve with ochre + golden green, and golden green is a very translucent color, so it took a while until I got that shape covered. I decided to add Hooker's green for the hearts, but it wasn't offering lots of covering neither, so I used it as base and then added a layer of the Americana Evergreen, wich had enough opacity to cover the areas without messing too much with other colors around.

*Round green bush. Again, Hooker's green for the shape, and for the spikes I mixed golden green with ochre and applied with a small brush.

*Small brown bushes. I painted first the darker shades with burnt umber, then added ochre lines and then white + cad. yellow for the lighter lines.

*Plants in the front. All this lines were made with Hooker's green and a bit of golden green for lighter areas.

*The Unicorn.  Again, you can see I was only covering with a flat layer of medium tone colors.  I used Thio Violet from Grumbacher Academy + Dioxazine Purple from Golden for the outlines. Thio Violet is a warmer shade, but I didn't want to add any brown to it, as I wanted the unicorn to look out of place, but in place... I wanted her to look like a mythic creature not only for the horn on her forehead.  So Dioxazine for the darker areas and thio violet for the medium areas of her hair.  For the body I used washes of pale terracotta, a bit of white on the mix and thio violet washes for the shades. Try to build up your shapes in this stage, as in following stages you will only bringing up the lights without much hassle =D


6. The stage without pics, damn wisdom teeth extraction!

Badaboom! Magic!


Yes, I'm sorry, I spent May 4th to May 6th with growing pain on my extraction areas and couldn't sleep much. I tried to work bit by bit on this painting but was sporadic and didn't document it =(

This was the 99% finished piece.

Having explained part of the process above, you can now see how the layers were buil:

* Unicorn's body shades:  Were a mixture of thio violet, and yes, I didn't wanted to add browns, BUT, there's the influence of a yellowish - brownish environment, so some of that warmth had to be added to her, so I used very thin washes of burnt sienna on her belly, her front legs, the shadows that her hair make on her fur and around her eyes to shape them a bit more.

* Unicorn hair.  We had previously build our hair shapes with thio violet and dioxazine purple. it was just matter of adding lighter details on her hair to add light and a bit of movement. I used my tiniest brush and thin layers of titanium white to paint this, just enjoy doing it just trying to remember that she has light coming from behind and also some light from the front. Play with the idea. I honesty didn't know what I was doing sometimes, but if you're afraid, go and check books, photographs , etc. So you can have a better understanding of light and its behavior.  I know I'm no master, I have lots to learn, but if I don't finish something I will stay here sucking my finger for the rest of my life xD

And I knew I wanted a mythical cute unicorn, and this was it !  No light source was going to stop me! *cries*

* TIP:  When having your shapes stablished, don't rush!  It's tempting as you're near the end just to spit white and get over with, right?  Try something different instead, get you favorite thin brush, your white, some clean water and start with diluted white, like almost transparent and play with the fur, thin lines of diluted white on the lighter parts of your shape, next, you will dilute a bit less, so the white lines will be more visible, and so on.  Also, you will see that the shape will be forming in front of your eyes, you will also notice that the whiter areas will be smaller as you keep working.  I also added some whiter areas to show texture on her belly and back legs.  Play with your brush, you'll discover new ways to achieve the look you want for your painting.

* This was the layer where I most used white. you can see that there's no white all over, I tried to leave this for the lightest areas of this painting: The unicorn, some leaves, the flowers in front, and the flowers in the back as well as the outer line of the trees in the back.  If you use too much white, you will limit yourself a lot with the rest of the colors! It's a very bad habit of mine, so I want this to change already!

* Added the lines of the sun just for fun, as well as the butterflies, I thought it needed a bit of movement and interaction with other critters. And they serve as well as a guide for your eyes to focus on her head, I hope so!

* As I was in the last details, I adde a bit of washed down Teal for some areas to add some volume and just a bit of very veeery watered down burnt siena on the hooves.  I added some burnt sienna to build the shadow on the ground. Fixed the texture of the ground with more yellow and some white for the lighter areas.

* Finished with the flowers and the plants in front.

And, I think that's all!

Ohh  if you wonder about her eyes!  I used dioxazine purple as the darker color, and then a mix of thio violet, yellow ochre and cad. yellow for the iris and then the white spot and some little spots with a bit of watered down white.


7. Sealing -> the end!
I added a couple layers of Jo Sonja's gloss varnish with a soft brush. Let it dry and well, show it to your loved ones =D


My last thoughts.
I acknowledge I need to learn a lot about painting. Some color theory won't hurt me!  But if something I've learned in this years is that, no matter how bad you think you worked on a piece. In a couple months later, you will be proud of what you did.  Don't stop trying, don't stop educating yourself.  We all have to keep learning in order to be better!

I learned a lot with this piece, first of all, planning. And with this comes the "take it slowly".  If you see that after 3 layers you feel you have a big ugly mess, it's how it's supposed to look at that stage. That "mess" will be the strong base in where you're building your whole painting. Spend the necessary time on this and you'll be spending less time fixing stuff in the end.

Last, but not least.  Don't over do it!  I've learned this as the years have passed. It's difficult because you might want to add a lot, but if you're prone to do this, leave your brush, take a deep breath and step away from it. If tomorrow you still want to add that detail, then add it. If not, then proceed to the next area you need to work with.  Adding details while working on the blocking of the shapes will make you lose perspective about the whole scene. I believe you need to add colors at the same time you try to understand how it affects the rest of your image. It might not show on this one painting, but hopefully in the future it will, but as a learning piece, I'm very very proud!

Why? you might ask.

Because I followed steps. Which is difficult when having focus issues =o  And I use to get very sad in the "ugly phase".  So actually finishing it was quite an achievement!


So, this is it.  I hope you find this helpful in your practice.  This is more my experience than a tutorial, but I wanted to share it with you in case that you might want a different perspective and to see that we all go through doubts while working on something!

Thanks a lot for watching and remember, if you have questions about materials I used, or about a step on the process, let me know through the comments!

You can also check my FB https://www.facebook.com/dianitaart and send me a message there =)


Also, please, don't use my images without permission!


Have a wonderful weekend!

Dianita
www.artbydianita.com
dianitaarts@gmail.com

May 14, 2015

The Last Unicorn screening and meeting Mr. Peter S. Beagle

Mr. Peter S. Beagle was recently at a screening on “The Last Unicorn” at the Alamo Drafthouse in Richardson, Tx, well, not that recently now I guess o.O  It was in April... 
Aanyway.
Watching the movie for the first time in more than 29 years and in the big screen with Mr. Vic who had never seen it before, was like going back to that night, when I was watching it on the TV. I  honestly believe it’s one of my first memories as a child, so I guess that’s why I felt like going back for a few minutes to that time when everything was fine. And yes, I cried a lot, but had to run to snag a good place in line to meet Mr. Beagle and sign a vintage copy of the book for one of my best friends​  and a signed print for me =)  
The line had some surprises, amazing cosplayers and an incredible puppet maker (I think!). Here are some pics of it =) )

Amazing Red Bull cosplay *.*
Gorgeous Amalthea Cosplay <3  


Puppeteer <3

Run Unicorn!!!! Run!!!

Mr. Beagle telling me stories ^-^  (srsly, ppl almost kill me)

Gorgeous Vintage edition now Signed!

Poster near the entrance <3

I'm truly sorry with all the people in line, but I swear, Mr. Beagle didn't want to stop his story! If you want to know, he was telling me about how he loves Mexico and he has many friends from there and family. I'm not sure if that's true, but well, he's a great storyteller! As you can see, when hubby took our pic, he was still talking and talking and talking xD  He's a very very funny guy, I'm glad fans everywhere are making his presence count!

Kuddos to the lady next to me at the cinema too, she was like the biggest fan in that place, she knew all that was to know about The last unicorn and all other of his stories. She jumped, laughed, she was super excited and she even noticed the vintage edition I had in my hands, she even had the VHS! I'm always impressed how I always get to be near awesome people who are passionate about what they like. Hugs to you, sweet lady! And for the lady that was next to her, drawing prior the screening, you go girl!!!  As far as I could peek, your drawing was beautiful! =D

And that's it for this post <3 I was very inspired by this incredible couple hours we spent there, even if the damned highway was closed in both directions when we were on our way.  Because, it's me, right?  Luckily we made it on time!

Thanks to hubby for getting the tickets to this screening, I know they make the tour often, but 29 years ago I never imagined I was going to meet, hug and listen stories directly from the author of this fascinating story!

I got some inspiration that day,
next post will be about that <3

Dianita
www.artbydianita.com
dianitaarts@gmail.com


Mar 20, 2015

Have you ever felt like you're able to relax a bit? It's weird what a little piece of art can show you.

Hi hi, how are you all?

I usually feel weird when I manage to draw a relaxed looking image (at least for me), after so many years under the blue and not knowing why, I finally feel fine.

This is a drawing I made last year, it was meant to be as part of Create & Inspire 30 days of art challenge (I just managed to do the first week), but it really jumps to me today... why?  because after almost a decade, I finally feel good and healthy!  Today hubby told me at 6:40 am (an hour earlier than our regular waking up time) that I looked fresher than practically every day. Apparently my thyroid med is doing its work slowly but steady and so weird!  I feel full of energy that is hard to go to sleep at night, and less hungry and almost no heavy head!

For me it's a miracle!

And I finally feel relaxed, happy, impressed on how much time I went without knowing I had this issue.  I can't thank enough to all my friends who were with me when I didn't know what was happening to me and when the stress broke me completely. Some chose to walk along the way with me, and with other friends, we decided to go separate ways. And it's always been ok, people change and you do not have to always adapt if you don't feel like to. I'm proud of those decisions, because we're doing well, sometimes you need to move forward, even if it's in a different direction.

I know this is not a pro-drawing, I need to focus more on technique and the wow factor. But today I finally feel related to her, which I usually can't do with my art. Sometimes you let it be, you let your hand and brain try to do the job of translating your feelings into pencil and paper, but I've never faced a moment where I understood the reason to be of a work you made.

woman horse skeleton art
Original available at http://artbydianita.storenvy.com/products/12539079-were-finally-safe-original-pencil-drawing

"We're finally safe"
Pencil on mixed media paper (Canson, acid free)
7"x10"
2014

She was a big challenge, her face is a refined version of all the faces I've made. I used Staedtler blue pencils in 2B, 4B, 6B and 0.3mm Alvin Draft/matic.

Size is a bit weird, since I honestly didn't look at the measurements of the paper when working on her (and many following drawings). But a custom made mat would do the work when framing <3

If you like her, the link to her sale page is above as caption of the image. Or if you prefer a direct sale, you can write me to dianitaarts@gmail.com

 Prints are available at Society6: http://society6.com/product/we-are-finally-safe_print#1=45

I hope you like her, I personally feel proud and humble. I'm satisfied with her, but I acknowledge my style needs lots of work! =)

I hope you have a wonderful day, thank you so much for watching and for your support!

Dianita
dianitaarts@gmail.com

Mar 19, 2015

When you have cute pony toys and you turn them into zombies.

Crazy Lily

Image property of Dianita (do not use without permission)


"They were playing hide and seek in the graveyard.
Yes. 
They were.
Who were they? – She asks herself every time when the hunger goes away.
There were laughs, yes, lots of laughs. Yet, she never moved from this gravestone… why? Why was everybody laughing?
Oh yes!
“I was counting!” – she smiled.
“1 … 2 …3 … “ – she knew she was counting, although her voice sounded so weird… “… 10… 11… 12…” there was no sound but her voice in the graveyard. “98… 98… 100!”
“Ready or not, here I come! “ she started walking, searching for her laughing friends, until the chain stopped her… Again.
At the distance, she saw curious faces. She could hear them laughing. She could smell their fear or excitement. Excitement was the best. 
She stopped pursuing her invisible friends and returned to the gravestone lying on the rocks, closing her eyes, lowering her muzzle to the ground. It never takes too much time until she can feel something touching her. One poke… 2 pokes… then she feels something pushing her. “ …3 …4… 5…”
And then laughs. 
“It’s so stupid! Dumb zombie! Hahahaha Look, look!” 
“Stop it! “ said another voice with fear “come on, let’s go! We shouldn’t be here!” 
“How boring, she’s sleeping, c’mon Crazy Lily, come and get us!!! Hahaha” 
The little pony was strongly poking her back, she didn’t feel pain, not even when her skin was breaking by the touch of the little pony hoof. 
And then… 
“100” 
Laughs always turn into screams. Yes, always. 
That day, it was the same. They were playing hide and seek, she was counting while they ran to hide. They all were laughing. And then she heard the screams. 
Yes, she remembers. 
Her own screams. 
And then, silence. 
She looked at the forest around her, nobody was around. The screams and cries stopped, warm blood ran through her mouth. 
“I was counting, they were laughing… yes”
“Who were they?"".
Image property of Dianita (do not use without permission)

Image property of Dianita (do not use without permission)

Image property of Dianita (do not use without permission)

Image property of Dianita (do not use without permission)

Image property of Dianita (do not use without permission)


Description

"Crazy Lily" is a custom pony made by me, Dianita. I used a g3 pony as a base and epoxy sculpt, acrylic paints, glossy sealant and swarovski crystals and a chain for her details. Her base is also designed and built by me using a wood plaque, acrylic paints, moss from a crafts store, glossy sealant, a spare block from what appears to be our new kitchen previous remodeling and lots of strong glue to keep it all together <3

As you can see, she was designed and made with lots of love and care, yes, lots of love, even if you don't believe it =)

My Lil' Zombies are an ongoing series of custom My little ponies that I started a few years ago and have become popular from time to time. They were mentioned in the most amazing feature from FearNET.com and have found loving homes in the most amazing families I could ever ask for in Germany and the USA.

I currently don't take commissions for custom ponies as they're very personal projects and I like to keep this hobby as something personal and fun. So from time to time, listings like this will pop in my store so it's your better chance to own one original and special design that will not be recreated in the future.

If you decide to give her a home, you agree that this is a display-only piece. It's not meant for kids to play or even to touch. It doesn't have sharp edges, but pieces can break and cut skin or be swallowed. So please, do not allow your kids to play with this pony. Of course, this means that if it falls to the ground, it might break, as any delicate piece. I will not be held responsible if you break it.

Shipping will be made in the most careful possible way to make sure your pony will be delivered safely. The inside will not look fancy, but it's for your pony's good, trust me.

This said, inside the USA I ship my items through Priority Mail . For international destinations, please contact me with your info to give you a more exact quote, I'm giving the most accurate prices I can offer right now for the most usual destinations.

However, in case that you choose not to buy insurance or registered mail for your package, I can't be held responsible for any kind of problem during the shipping process.

You can see more of my works onhttp://www.artbydianita.com and follow my future projects (art and crafts, including custom toys) athttp://www.facebook.com/dianitaart.

RESIDENTS OF TEXAS.
The Local Sales and Use Tax (8.25%) will be added for items purchased by residents of the state of Texas.

COPYRIGHT: All artwork by Dianita (Diana Vargas Sampieri) are copyrighted material and may not be reproduced in any manner on the internet, nor paper or any other material or means of reproduction without the express written and signed permission by the artist Dianita (Diana Vargas Sampieri), this includes all reproductions and originals. All rights are retained by the artist Dianita (Diana Vargas Sampieri).

Mar 11, 2015

Choco chip kitties overload! Art for "Candy Coated Dreams Show"


"With choco chip kitties on top please"
Watercolor, acrylics and pigments on watercolor paper (canson, 140 lb)
8x10 inches  (framed)
2015

Dianita


This was a painting I made for this show:


It will be on the exhibition from March 7th to May 2nd.  And includes art from amazing artist, one of them being one of my best friends Tammy Street ( Tamisery) !  with her cute piece "Cotton Candy & Little Lad Gumdrop" that sold during the opening night! (Grats girl!!)


(image taken from Tamisery's FB page  )

I'm patiently waiting to see more pics from the opening night to share them here too.  There were many many great artists participating:


Jennifer D. Basing
Stefanie Merullo
Erika Taguchi
Jellykoe
Alisha Koyanis
Brandy Rumiez (Promo image)
MsBittyKnacks
Sugar Fueled
Natasha Westcoat
Spazzy Wonder
Brenda Burton
Jared Konopitski
Irma Galindo
Raúl Guerra 
Mizna Wada
Mayte Bringas
Stitch of Whimsy
Chris Rude
Matt Vazquez
JR Linton
McGreens
Acrylicana
Amanda Pandacakes
Julie Filipenko
Squid Vichuss
Andy Cordero
Carolina Lebar


So, you can imagine that I feel very humble to be participating with many known artists =)  I wish I could be there in person to see her around so many pretty arts and crafts!

Thank you to the staff at Slushbox Gallery for their warm welcome to their show and all their hard work to make this and all their shows a success.

More updates coming soon!

Thank you for reading!

Dianita

COPYRIGHT: All artwork by Dianita (Diana Vargas Sampieri) are copyrighted material and may not be reproduced in any manner on the internet, nor paper or any other material or means of reproduction without the express written and signed permission by the artist Dianita (Diana Vargas Sampieri), this includes all reproductions and originals. All rights are retained by the artist Dianita (Diana Vargas Sampieri).

Mar 6, 2015

New year, new life.

Good afternoon everyone!

As you can see, I got lost during this months. I just moved out of my country and started finally my marriage life with my amazing hubby after 3 years married and waiting for immigration to process my case.


All is set, I'm at my new home and already overwhelmed at the opportunities I can reach! I finally set up my artist room, worked on a piece for Slushbox Gallery   for their "Candy Coated Dreams" show opening tomorrow (March 7th, 2015)  and really excited as I'm joining the amazing Ink & Pistons artists, one of my best friends Tamisery  and lots of incredible artists like Raul Guerra, Acrylicana, Jen D. Basing, Sugar Fueled, Julie Filipenco, Squidvishuss,Carolina Lebar, Mizna Wada, Jared Konopitski, Sara Leigh, and I'm sure some more !  I can't wait to see the pieces all together in the show, I wish I could go!

So, along with this busy start of the year, I hope to be updating this blog regularly. I'm joining Rebecca Guay's wonderful idea of promoting artist friends. So, I know I'm not famous, but I hope this space can be used for my friends to know each other's talents and we can be a big machine in order to let the world know amazing undervalued artists exist =)

That, and hubby is bugging me with making my youtube channel... That one is still a maybe, I don't like to talk or be on camera, but we'll see.  I need a camera with video recording and a tripod. Let's see if business picks up and I can overcome my fears of being recorded hahaha


Ok, this is just a text update, I will be writing here much more, so I hope this helps me to stay active and keep pursuing my goals (and use my time on something better while I recover from a shoulder injury xD)

Thanks for reading and for your visit.
All my love to you all!
Dianita

Nov 5, 2014

"She lights her own path" Newest drawing

Hello, how's everyone doing?

It has taken me a bit of time for updating this blog, mostly because of my lack of pictures. I've forgotten to take pics of the progress on my latest drawings =|  I'm so sorry about that!

Here's the last one I made past month. I tried (not hard enough) to participate in a challenge of 30 days of creativity. It ate me in the 8th =(   It was all my doing, because I couldn't stand leaving this drawings without finishing! So, because of that, I just had 8 finished ones, instead of 30.

So, this is the last one I created, I will post 1 each day, so you can have the chance to check them  =)


"She lights her own path"
Pencil on Canson Mixed Media paper.
7" x 10"
2014


Here's a little close up on her face, the drawing itself is small so there's not much detail, but I must admit I really had a great time drawing her face =)


I used Staedtler Mars Lumograph pencils 2H, 4H, 2B, 4B, 6B.  Blackwing Palomino and Alvin Draft/matic 0.3mm with 2B leads.

I hope you like her =)
Thanks a lot for stopping by!
Have a wonderful day!

Dianita
Website   Facebook     Twitter