HotBliggityblog01

Showing posts with label painting. Show all posts

Jan 15, 2016

Art I made for our Blizzcon 2015 badges

Hello!
Hola!

I'm about to start today's drawing practices, but I recalled I haven't posted the art I made for our Blizzcon 2015 badges. I know, kinda late as it was back in November 2015, but those days were crazy with trip prepping and then holiday travel for December.

I made a painting for hubby.  It is the first painted personal piece I've finished with oils in a long long time. It was supposed to be a cute one, but it ended up being a bit fierce looking. The blue armored Tauren is Darkarcanine, his Resto/Ele Shaman and the bear is his recent favorite, his Guardian/Feral Druid Darkmew.  Being excited as I was, I forgot that shamans principal spell color is blue T^T. But I found one that is green, sooo, it counts =P

For me, it's a very very special piece. Not only because it's for my husband, but also because it shows some improvement on details that have been frustrating me for months (years to be honest). I reckon, the shaman could use some more planning, armor is not easy to paint... less with a dark skinned character (current models are a pain in the butt =| ) .  But what I'm proud of it's the Druid. He became the focal point thanks to the detail I was able to paint (and shape definition perhaps?)

Also, the background. I enjoy a lot to paint this warm skies.  I find my inspiration on Julie Bell's paintings all the time! I've learned a lot by watching her pieces, thanks to a book a friend gave me years ago and some searching through the web.

But for a quick painting (about a month or so of work or less)  I believe it's a breakthrough piece for me =) .

Painting size is 16 in x 20 in, it's made with Winton Oil paints (W&N) and lineseed oil on canvas panel.  I still need to make a better set up to photograph properly this pieces =)   Will be watching some Ryan Pancoast's tutorials for this, he made a great one on his youtube channel on artwork photography =D

Estoy a punto de comenzar mis prácticas de dibujo hoy, pero recordé que aún no comparto las piezas que hice para nuestros gafetes de la Blizzcon 2015.  Sé que es un poco tarde porque fue en Noviembre del 2015, pero esos días se alocaron de más gracias a los preparativos de ese viaje y el de Diciembre =(.

Hice esta pintura para mi esposo. Es la primera pintura personal que he terminado con óleos  en mucho mucho tiempo. Se supone sería una pintura graciosa, pero terminó siendo una pieza más de acción. El Tauren en armadura azul es Darkarcanine, su shamán resto/ele  y su reciente favorito, su druida feral/guardian Darkmew. Me emocioné tanto, que olvidé que el color para los heals del shamán son principalmente azules... pero encontré uno que es verde, así que cuenta =P

Para mí, es una pieza muy especial. No sólo por ser para mi esposo, sino porque también muestra un poco de avance en detalles que me han frustrado por meses (anios para ser honesta). Reconozco que el shamán puede beneficiarse de algo más de planeación, además que la armadura no es fácil d e pintar y menos con un personaje con pelaje oscuro (los modelos recientes hacen que ésto se vuelva más difícil!). Pero lo que me enorgullece es el Druida. Se convirtió en el punto focal gracias al detalle que pude lograr (y creo que también que pude definir bien su forma).


También, el fondo. Disfruto mucho pintando cielos en tonos cálidos. Encuentro mucha inspiración en pinturas de Julie Bell todo el tiempo! He aprendido mucho observando sus piezas, gracias a un libro que un queridísimo amigo me regaló hace anios <3  además de imágenes en internet.

Para una pieza hecha a paso rápido (menos de un mes), creo que es un parteaguas para mí =)


La pintura mide 16 pulgadas x 20 pulgadas ( 40.6cm x 50.8cm) y está hecha con óleos marca Winton (Winsor&Newton) y aceite de linaza en panel con tela.  Aún necesito mejorar mi arreglo para fotografiar mejor éste tipo de piezas. Estaré checando videos de Ryan Pancoast y sus consejos para tomar fotos de pinturas =)

 
Darkarcanine and Darkmew.
Oil on canvas panel.
16 in x 20in
2015
Not for sale.
Based on characters from World of Warcraft.
www.artbydianita.com dianitaarts@gmail.com - www.facebook.com/dianitaart


The next piece was for my badge and my tshirt <3

It's a pencil drawing of my 3 main characters, Jurietah (warlock), Mazapán (Druid) and Dianitoh (DK) ^^  Also, Darkarcanine makes an appearance on the top left (hubby's shammy).  And our Windrider cub and Pepe <3

This was a fairly quick one, I finished in about 2 hours or so, not polished at all, but made a pretty pretty print =D So, I'm proud ^^  It's the first time in a looong long time I make a pic for myself of my own characters. It was so exciting!

La siguiente pieza, fue para mi gafete y mi camiseta <3

Es un dibujo a lápiz de mis 3 personajes principales en el WoW, Jurietah (Warlock), Mazapán (Druid) and Dianitoh (DK). También, Darkarcanine hace una mini aparición a la izquierda (el personaje de mi esposo) y nuestro windrider y Pepe <3

Este sí fue un dibujo rapidito, creo que lo acabé en 2 hrs y por lo mismo no tiene tanto detalle ni buen acabado, peeero, qué bonita salió la impresión! =D  Tenia rato de no dibujar algo para mí y dibujar a mis personajes fue muy muy divertido ! ^^


My WoW Chars <3
Jurietah, Mazapán and Dianitoh.
Pencil on mixed media paper. 2 hrs.
Please, do not use T^T
Based on characters from World of Warcraft.
www.artbydianita.com - dianitaarts@gmail.com - www.facebook.com/dianitaart


I hope you like this couple pieces! Remember, you can follow my updates through facebook, twitter, Instagram, or by email:

Espero les hayan gustado. Recuerden, pueden seguir mis actualizaciones a través de facebook, twitter, Instagram o email!:


Dec 7, 2015

Amazing artists pages for your Christmas or early Valentines shopping!

Hi!

As Christmas is drawing near, I thought it's a great idea to share with you some amazing pages from dear friends who are extremely talented and have wonderful wooonderful pieces at different price points, from the most affordable to the OOAK original piece for you to make someone smile even more!

Let's jump into the features!

(Images link to their respective sites! )

http://www.tamisery.com


Her Floral Unicorn is beyond cute!
Get your prints at: http://www.storenvy.com/products/12305261-8-x-10-floral-baby-unicorn-art-print


Tamisery's talent is beyond words!  I've known her since she entered the MLPArena and asked her for some advice on how to improve my art. I consider her one of my best friends in the whole wide world, even if we still need to meet in person!

I can't honestly tell you how amazing she is. She's good at drawings, paintings, sculpting, digital art, vectors. You name it, she will make an excellent job! She has some amazing pieces that I just drool and drool for, I need them all in my life T^T

I own 2 prints from her, and sculpted earrings from a long time ago (I lost one at Space Mountain in 2012 T^T) ,  you can definitely feel the love and care she puts on her products, amazing quality on her homemade prints and incredible attention to detail in every image she produces!

"Behold God" Limited edition print by Tamisery <3
https://www.etsy.com/listing/248377289/behold-god-13x19-limited-edition-museum?ref=shop_home_active_3


"Dripping" limited edition print by Tamisery
http://www.storenvy.com/products/10988736-limited-edition-signed-and-numbered-8x8-dripping-art-print-on-archival-p

And she has this awesome AWESOME art for the Moon Crisis show last year, called "I remember you" !! <3  Featuring Chibi-Usa and the gorgeous Pegasus <3  (Saving for this one! )

Click click clickety to get your signed and numbered print!

 http://www.storenvy.com/products/9611260-moon-crisis-gallery-show-sailor-moon-inspired-art-print-i-remember-you-m

Support her work by following her and purchasing products directly from her!


https://www.instagram.com/tamiserystreet/


Those are the main sites you can find her art, as well as purchase her homemade amazing prints or commission special pieces!  She will be displaying the original "Dripping" piece at the last show in The Cotton Candy Machine 's physical location, so if you're in the Brooklyn area, go ahead and assist to this amazing event!


Next one is:


I loove her ID! ^


Piquipauparro!

Where does her talents end? No idea!

When I was introduced with her, on an online group, she made this curious, fabulous digital and traditional drawings. From there, she started to make adorable fabric kitty companions (I have some of them !)  and today she makes the most amazing, impressively detailed characters plushies! She's another example of attention to details, fromt he fabric choice, to what she uses for bases and accessories and final detailing for her works.


Beautiful handmade Toothless plushies!
She has also made needle-felt dolls and sculptures, fur suits for a local business in Mexico City, tiny polymer clay sculptures, oh gosh, you won't get tired of her work!  She's aiming to increase her range of products to a more affordable range as well with some DIY projects!  I can't wait to check on her future projects!  I know some, but I won't tell you ! =D

You can mainly check her updates on her pages:


As far as I know, as she lives in Mexico, international shipping for the holidays makes it difficult for her to send items to other countries during this months. But you can write her for future commissions info or for her to include you in her wait list for next year!  She's a busy girl that spends all day trying to get more ideas flowing!  (you need to rest! >:( )

I love my kitties! I will bring them with me in January <3 Visit her page for gooorgeous plushie art!!
http://piquipauparro.deviantart.com/

She is currently trying to help her family as she works from the time she gets up to the time she finally decides to go to sleep at night.  Please, support her work by purchasing directly from her and by sharing her pages! =D  So she can sleep more and be strong, healthy and happy to keep doing what she loves more in the world <3  ^-^


Starting with the custom vinyl toys section, my list is too wide, but I'll be featuring my favorite customizers eventually.  For today, I'd like to start with one of my friends and amazing supporter, Studio JujuB !


Miss C, owner of Studio JujuB, is a very talented artist as well!  She makes this incredible Dreadlocks My little ponies that add a really incredible piece for your collections! I believe her works deserve much more viewers!  As a customizer, I know materials can get really expensive and doing any kind of weird idea consumes time, effort and an incredible amount of patience to be developed!  

G3 TE Masquerade with dreadlocks!  how amazing is that? ! 

She's currently starting to develop more digital art of her amazing selection of OC's, as well as small crafts if you're looking for a little special gift for someone in your life! I own a little cute clay bear she gave me as part of a little giveaway she made, it's a gorgeous piece I have on display in my small studio, on my inspiration shelf <3 She takes commissions, don't forget about that!

Don't mind my shelf <3  <3  Go and check her art and crafts and get something for yourself of a loved person!!
https://www.facebook.com/JujuzBoutiquezNCrafts


Visit her sites for more info and more pics of her pieces!


Last but not least important! (you know, it's difficult to choose orders between loved friends and awesome artists!), let me introduce you to BlueAlhena <3

More of her awesome art at http://bluealhena.deviantart.com/


This wonderful lady is also one of my favorite persons in the world, she works non-stop, has an EdD. and she's aiming to publish books for children <3  She's also into drawing, painting, craft making aaand ! She makes awesome dishes and desserts! <3   But it's hard to show you how good she is cooking, so I will focus on how amazing she's at drawing =D

Her images are usually made with markers, which she adoores. But she developed a series of 4 paintings depicting Seasons for a local little dessert store ran by a dear friend:
 https://www.facebook.com/pixypasteleria 
paintings she made with acrylics and are now showing on the store <3

One of my favorite pieces from her is "Hada Morgana"  which I think I've seen in person (she's also the girlfriend of one of my best friends <3 and he had this little collection of her drawings  * melts * ).  Hada Morgana has all the details I love of her works, watching it in person lets you see all the details and blending that she develops as well as her amazing style for making cracks on drawn walls and jewels <3

Hada Morgana by BlueAlhena
http://bluealhena.deviantart.com/


I'm not sure if she's taking commissions, but you can always ask!  She's really fast and dedicated and has this impressive attention to detail that you will love to see your OC in her style!  She uses to go to a local convention in Mexico, last one was this weekend =)

Do you want a wonderful pic for your loved one this next Valentine's day?  Visit her page, drop her a message and open the door to her wonderful world of magic and color! I'm sure you'll loooooove what she will make for you!

You can follow her work at: 


Oh!  Forgot to mention...

Not even kiddin! =3 I love and miss visiting them for coffee <3
<3 <3 <3


And, that's it for today =)

I will see if I can get my ideas together and try to make a weekly feature for my favorite pieces on a week ^-^  So I can feature more and more of my dear friends and favorite artists!!  This group of girls is really close to my heart, they're gorgeous persons as well as incredibly talented artists and crafters (multitasking as well!! ) 

This plan will start next Monday!  I hope to be able to make it during the holidays!  My phone is not the best way to feature anything, I swear =|

Well,  I'll have to get back to work. I hope you liked this little post, remember to support your friends and favorite artists by sharing their work with your people!!

See you tomorrow! <3

Dianita

www.artbydianita.com
dianitaarts@gmail.com
www.facebook.com/dianitaart

May 16, 2015

"Old as the sky, old as the moon" My tribute to The last unicorn (includes progress photos!)

Hi everyone! How are you?

First, let me show you what you came to see:

the last unicorn tribute
Art: ©2015. Diana Vargas Sampieri (Dianita). All rights reserved.
The last unicorn is property of Peter S. Beagle.


"Old as the sky, old as the moon"

Tribute to The last unicorn
Acrylics on wood.
8in x 6in painted area approximately.
Dianita
2015

$125 usd + shipping.
Sales info: dianitaarts@gmail.com


She was supposed to be participating on Slushbox Gallery show "Nerdcore", but having my wisdom teeth removal surgery scheduled for April 30th distracted me and couldn't develop the idea properly on time. I tried to finish it, but those days after surgery I experienced painful muscle spasms and 2 sleepless and uncomfortable nights in a row. So, yay me.  Hugs to Amanda and all the team from Slushbox, they're amazing!  Go visit their site http://www.slushbox.com and check their current show pieces there!

I documented the process as well as I could, there were some steps I missed and I blame my meds for that!

Enjoy!


1.  The sketch.

the last unicorn tribute
Messy messy!


Just right after surgery, this dumb girl tried to woman up and start doing things right away. Good, you might think. WRONG!  But one thing came up well that day, and it was this final sketch. I had the idea lying around for weeks, but when your doctor sets the day for your first surgery ever you can't really focus on much =|

I didn't spend much time on details here, I knew what I wanted, I aimed for a cute, dynamic pose that could fit on a wood piece I got from Michaels (http://www.michaels.com). I love those wood rounds!

Anyway, my advice to you, sketch your ideas!  Basic sh!t, right?  well, I fail horribly on it. I always go "Leeeeeeroyyyy Jeeeenkeeeeeeeiiiins" when I'm excited and yes, as you imagine, I never finish those pieces because I get lost in the middle of the process. Sooo, plan as much as you can!


2. Sketch to wood.
And, no pic here! =D

But, it's not that hard!

You can check the process here, very very well explained by Jel Ena:

https://www.facebook.com/jel.ena.art/posts/466920026792615


In the video, you can actually see that she takes her sketch and adds a layer of graphite on the back of the sheet.  What I did was that I actually made a photocopy of my sketch, so I didn't have to tear my sketchbook apart, and on the back of the photocopy, I added the graphite with what I think it was a 2B Mars pencil.

If you have a more detailed sketch, you might see that the photocopy will not take many of the details as it should, here it wasn't my case as it was a messy one. But if you find yourself in that situation, you could add one more step:  If you have a lightbox, trace your drawing on a new paper, I would use a normal printer paper if the piece is small or other kind of cheap paper if you prefer. So you will be adding graphite to the back of cheap paper instead of your sketchbook!  (again, basic, but this is not my forte, I swear!)

And, if you don't have a lightbox, go the cheap way like me!  you might have windows at home, right? this will involve to tear your sketchbook page out, but you can carefully store it in a safe location with acid free plastic bags. I use to do this when I have to take this path.  Just tape it on the window, tape your new sheet on top of it and trace, trace, trace!  Of course, daylight hours are a must.

Or, you can go the cheapskate way (not that I've done it *cof cof*), if you have a small desk lamp and a glass table, those make good cheap lightboxes too =P   and if you're very veeery limited and only have a desk lamp... a little bird told me you can tape a sheet of paper to it and then your drawing on top, with the new sheet glued to it.  It's challenging, and sloooow...  but it works  *ehem*  yes, the bird told me so!

White lights are good and the best ones for this from my experience.


Of course, I forgot again to photograph the traced drawing.  But it's not that hard to imagine it, it was closer to the initial sketch =)

This is the transferred image with detailing added:

I wanted to add more and more details T^T  I loved the backgrounds in the movie!
After the sketch is ready, I added a couple layers of Golden Matte Medium. I love this one, it works as a clear sealant that won't add too much grain to the surface, but enough to handle oils or acrylics, or to mix with PearlEx pigments <3

I think I added 2 layers, well thinned down with a bit of water.  After the first layer dried, I added the 2nd, again, thinned down, but not watery!

You let this dry overnight and you're ready =)


3. Blocking background colors.


You can see the actual reference image on my phone.  And that spunky brush on the left! The oldest one I have!

Blocking the colors is something I've learned in this months.  Many, if not all artist I follow does this methodically. Usually, they block colors with acrylics to speed the drying process and then add the last layers with oils.  I will start doing this too, I just need to learn a bit of color theory! 

I happily understood quickly that the base color for the background had to be yellow. YAY!

By looking at the pic, I tried to come up with a practical color palette. This was, from Golden Acrylics Cadmium yellow, burnt sienna, yellow ochre, golden green, dioxazine purple, naples yellow, burnt umber, teal and titanium white.  From Grumbacher Academy I used Hooker's green and Thio Violet.  From Americana, I used Evergreen. Oh, and from Winsor&Newton Galeria, Pale Terracotta.

I took my Golden Acrylics Cadmium Yellow and made a quick wash on the whole background. I left the unicorn out of the yellow washes because I didn't want for the yellow to be too noticeable in the final stages. I'll talk about it later =) .   As you can see on my reference photo, the whole sky is yellow, the trees in the middle are more like ochre and the trees exactly behind the unicorn are like a dark gold/greenish color.  So I decided this was going to be my order.

You can see in the pic that I used a light wash of  Cadmium yellow for the sky. Then started to add a bit of a darker color on the 2nd layer with the yellow ochre mixed still with cadmium yellow.

It doesn't show here, but I tried to cover with 2 or 3 layers of each shade, to hide any imperfection but don't worry too much about it! Remember that this are only your first layers =)


4. Building up.  

YAY! Blurry pic!  just as you wanted to see!  * hides *
And yeah, I don't have a good pic of the next steps. This was the process.


* Kept adding more cadmium yellow to build a solid yellow sky on the background.

* Started to add light washes of color.  For the trees, washes of burnt sienna, sometimes mixed with a bit of yellow ochre to keep the yellow influence of the background. I also built the shadow/light areas of the trees in the right part of the painting.  Ochre + burnt sienna for the medium color areas, pure burnt sienna for the shadows.  The yellow bushes were a mix of cadmium yellow and ochre.  The green bushes I used cadmium yellow + golden green.  For the dark green bush I used phtalo green first from Grumbacher, but it's a bit blueish, so it didn't go well. So I added layers of Hooker's green from Grumbacher Academy.  This worked wonders for the round bush to the right.

* Started to build up texture on the trees using the darker tone I assigned for each one.  Burnt sienna for the bushes on the back and burnt umber for the ones closer to the front.  The tree immediately to the left of the unicorn had also some hints of golden green and ochre while working on it.

* The yellow bushes on the left were the ones I started detailing. It was easier to make this decision as the layers were ready for detailing already in that zone (burnt sienna for shadow, ochre/cadmium yell. for the medium color and pure cadmium yellow for the lighter.  I didn't add white as I wanted the unicorn to be the whiter element there.  So when starting to add the leaves, I used burnt sienna for the darker ones, ochre for the medium ones and naples yellow for the brighter ones on the top.

* For the ground, it was an easy choice. Ochre washes until the surface was evenly covered. Then cadmium yellow for the rounds.

This was how it looked after doing all I mentioned above:

Still in the ugly phase, but something it's certain. A few layers after, it always get better, I promise!


5. The Unicorn and adding more detail.

Again, looks like a magic step here =o


Patience! Building layers takes patience, it's worth it!


I took this photo after doing just a bit of work. Looks like a lot, but I discovered that it's just matter of following steps when it's the time, not rushing anything and enjoying the process.

What I did to reach this stage was:

* Trees in the right: Made sure that the base shape was well defined and lighter/medium/shadow zones were clearly covered (yellow/ochre/burnt sienna).  Then I started to add the leaves. The darker ones in the darker zones, the medium colored ones in the medium shade zone and the lighter ones on the edges where the strong yellow light hits. I played with naples yellow and cadmium yellow on this, no white so far! I also added a different tree with some flowers hanging, I liked that detail on the background of my reference pic and wanted to add it. Same happened here, Darker green in the basic shape, lighter green for the leaves.

*Bush with heart leaves: This was actually a challenge. This one had a green that I could only achieve with ochre + golden green, and golden green is a very translucent color, so it took a while until I got that shape covered. I decided to add Hooker's green for the hearts, but it wasn't offering lots of covering neither, so I used it as base and then added a layer of the Americana Evergreen, wich had enough opacity to cover the areas without messing too much with other colors around.

*Round green bush. Again, Hooker's green for the shape, and for the spikes I mixed golden green with ochre and applied with a small brush.

*Small brown bushes. I painted first the darker shades with burnt umber, then added ochre lines and then white + cad. yellow for the lighter lines.

*Plants in the front. All this lines were made with Hooker's green and a bit of golden green for lighter areas.

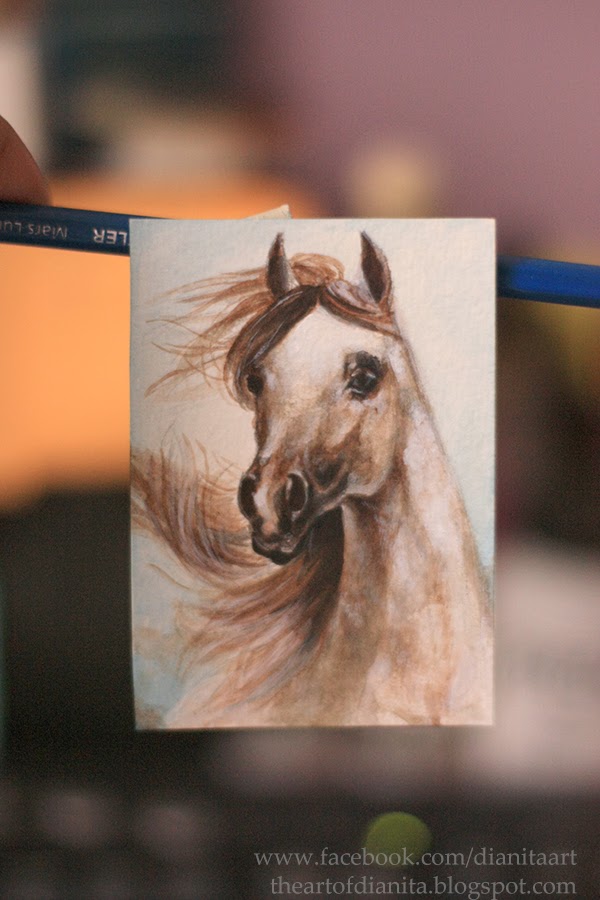
*The Unicorn.  Again, you can see I was only covering with a flat layer of medium tone colors.  I used Thio Violet from Grumbacher Academy + Dioxazine Purple from Golden for the outlines. Thio Violet is a warmer shade, but I didn't want to add any brown to it, as I wanted the unicorn to look out of place, but in place... I wanted her to look like a mythic creature not only for the horn on her forehead.  So Dioxazine for the darker areas and thio violet for the medium areas of her hair.  For the body I used washes of pale terracotta, a bit of white on the mix and thio violet washes for the shades. Try to build up your shapes in this stage, as in following stages you will only bringing up the lights without much hassle =D


6. The stage without pics, damn wisdom teeth extraction!

Badaboom! Magic!


Yes, I'm sorry, I spent May 4th to May 6th with growing pain on my extraction areas and couldn't sleep much. I tried to work bit by bit on this painting but was sporadic and didn't document it =(

This was the 99% finished piece.

Having explained part of the process above, you can now see how the layers were buil:

* Unicorn's body shades:  Were a mixture of thio violet, and yes, I didn't wanted to add browns, BUT, there's the influence of a yellowish - brownish environment, so some of that warmth had to be added to her, so I used very thin washes of burnt sienna on her belly, her front legs, the shadows that her hair make on her fur and around her eyes to shape them a bit more.

* Unicorn hair.  We had previously build our hair shapes with thio violet and dioxazine purple. it was just matter of adding lighter details on her hair to add light and a bit of movement. I used my tiniest brush and thin layers of titanium white to paint this, just enjoy doing it just trying to remember that she has light coming from behind and also some light from the front. Play with the idea. I honesty didn't know what I was doing sometimes, but if you're afraid, go and check books, photographs , etc. So you can have a better understanding of light and its behavior.  I know I'm no master, I have lots to learn, but if I don't finish something I will stay here sucking my finger for the rest of my life xD

And I knew I wanted a mythical cute unicorn, and this was it !  No light source was going to stop me! *cries*

* TIP:  When having your shapes stablished, don't rush!  It's tempting as you're near the end just to spit white and get over with, right?  Try something different instead, get you favorite thin brush, your white, some clean water and start with diluted white, like almost transparent and play with the fur, thin lines of diluted white on the lighter parts of your shape, next, you will dilute a bit less, so the white lines will be more visible, and so on.  Also, you will see that the shape will be forming in front of your eyes, you will also notice that the whiter areas will be smaller as you keep working.  I also added some whiter areas to show texture on her belly and back legs.  Play with your brush, you'll discover new ways to achieve the look you want for your painting.

* This was the layer where I most used white. you can see that there's no white all over, I tried to leave this for the lightest areas of this painting: The unicorn, some leaves, the flowers in front, and the flowers in the back as well as the outer line of the trees in the back.  If you use too much white, you will limit yourself a lot with the rest of the colors! It's a very bad habit of mine, so I want this to change already!

* Added the lines of the sun just for fun, as well as the butterflies, I thought it needed a bit of movement and interaction with other critters. And they serve as well as a guide for your eyes to focus on her head, I hope so!

* As I was in the last details, I adde a bit of washed down Teal for some areas to add some volume and just a bit of very veeery watered down burnt siena on the hooves.  I added some burnt sienna to build the shadow on the ground. Fixed the texture of the ground with more yellow and some white for the lighter areas.

* Finished with the flowers and the plants in front.

And, I think that's all!

Ohh  if you wonder about her eyes!  I used dioxazine purple as the darker color, and then a mix of thio violet, yellow ochre and cad. yellow for the iris and then the white spot and some little spots with a bit of watered down white.


7. Sealing -> the end!
I added a couple layers of Jo Sonja's gloss varnish with a soft brush. Let it dry and well, show it to your loved ones =D


My last thoughts.
I acknowledge I need to learn a lot about painting. Some color theory won't hurt me!  But if something I've learned in this years is that, no matter how bad you think you worked on a piece. In a couple months later, you will be proud of what you did.  Don't stop trying, don't stop educating yourself.  We all have to keep learning in order to be better!

I learned a lot with this piece, first of all, planning. And with this comes the "take it slowly".  If you see that after 3 layers you feel you have a big ugly mess, it's how it's supposed to look at that stage. That "mess" will be the strong base in where you're building your whole painting. Spend the necessary time on this and you'll be spending less time fixing stuff in the end.

Last, but not least.  Don't over do it!  I've learned this as the years have passed. It's difficult because you might want to add a lot, but if you're prone to do this, leave your brush, take a deep breath and step away from it. If tomorrow you still want to add that detail, then add it. If not, then proceed to the next area you need to work with.  Adding details while working on the blocking of the shapes will make you lose perspective about the whole scene. I believe you need to add colors at the same time you try to understand how it affects the rest of your image. It might not show on this one painting, but hopefully in the future it will, but as a learning piece, I'm very very proud!

Why? you might ask.

Because I followed steps. Which is difficult when having focus issues =o  And I use to get very sad in the "ugly phase".  So actually finishing it was quite an achievement!


So, this is it.  I hope you find this helpful in your practice.  This is more my experience than a tutorial, but I wanted to share it with you in case that you might want a different perspective and to see that we all go through doubts while working on something!

Thanks a lot for watching and remember, if you have questions about materials I used, or about a step on the process, let me know through the comments!

You can also check my FB https://www.facebook.com/dianitaart and send me a message there =)


Also, please, don't use my images without permission!


Have a wonderful weekend!

Dianita
www.artbydianita.com
dianitaarts@gmail.com

Mar 11, 2015

Choco chip kitties overload! Art for "Candy Coated Dreams Show"


"With choco chip kitties on top please"
Watercolor, acrylics and pigments on watercolor paper (canson, 140 lb)
8x10 inches  (framed)
2015

Dianita


This was a painting I made for this show:


It will be on the exhibition from March 7th to May 2nd.  And includes art from amazing artist, one of them being one of my best friends Tammy Street ( Tamisery) !  with her cute piece "Cotton Candy & Little Lad Gumdrop" that sold during the opening night! (Grats girl!!)


(image taken from Tamisery's FB page  )

I'm patiently waiting to see more pics from the opening night to share them here too.  There were many many great artists participating:


Jennifer D. Basing
Stefanie Merullo
Erika Taguchi
Jellykoe
Alisha Koyanis
Brandy Rumiez (Promo image)
MsBittyKnacks
Sugar Fueled
Natasha Westcoat
Spazzy Wonder
Brenda Burton
Jared Konopitski
Irma Galindo
Raúl Guerra 
Mizna Wada
Mayte Bringas
Stitch of Whimsy
Chris Rude
Matt Vazquez
JR Linton
McGreens
Acrylicana
Amanda Pandacakes
Julie Filipenko
Squid Vichuss
Andy Cordero
Carolina Lebar


So, you can imagine that I feel very humble to be participating with many known artists =)  I wish I could be there in person to see her around so many pretty arts and crafts!

Thank you to the staff at Slushbox Gallery for their warm welcome to their show and all their hard work to make this and all their shows a success.

More updates coming soon!

Thank you for reading!

Dianita

COPYRIGHT: All artwork by Dianita (Diana Vargas Sampieri) are copyrighted material and may not be reproduced in any manner on the internet, nor paper or any other material or means of reproduction without the express written and signed permission by the artist Dianita (Diana Vargas Sampieri), this includes all reproductions and originals. All rights are retained by the artist Dianita (Diana Vargas Sampieri).

Aug 6, 2014

"The Dragon's Keeper" a new oil painting.


"The Dragon's Keeper"  started as a very very ambitious idea for me. I was pretty scared because I wanted to add elements I was not comfortable with and take a chance on a different composition.  Of course, i'm used to single character portraits and no backgrounds, so it was a big and scary picture for me!

The sketch is something I'm honestly going to frame.  I loved it so much!   You can check the sketch, I had it stored in a box because we moved to a house a couple months ago.


When facing the moment where I had to start transferring it to the canvas panel, I was seriously thinking on just going full pencil shading on it, I have a big fear of oil painting because I've faced lots of disasters when working on them.  It might have to do with the fact that I lose the pencil marks under the layers of oil paint or the fact that I get too excited and start this "tunnel-vision" stage where I work work work and in the end I repent!  It happened like 3 times this with this pair!

I'm too ashamed to post the big mistakes, after the first attempt, I even changed her face. I liked the expression, but her head came up too big =(  The next time I did have something really interesting, but oh yeah!  I over worked it and it turned to be a very very awful attempt to make a human face.


(I can't believe I didn't continue with this option...  it was beauuutiful and I messed it up and couldn't get her to look like it again T.T)


And, after some days of crying, anxiety and what-not , i decided that this was going to be the last attempt before stopping for a longer time to take a break from her.

During all this process, one of my best friends and one of the artists I incredibly admire, Tamisery  , gave me some pointers and helped me to develop a bit more the idea. As well as revisions with colors, composition and lots of details.  I hope i can paint like her someday T.T  She and her husband are the most amazing and talented people and they always find the time to help me with my art.

And also, my husband, he was the one who gave me the hugs I needed when frustration was overwhelming me.  He knows that I want to be good, but I somehow have troubles understanding theory and I'm so tired of making mistakes that not doing a nice painting or piece really really shakes me completely. He's the one that helped me with a more commercial-type-of-client perspective.    Of course, I know this is not his cup of tea, but he made his best and helped me a lot along the way with the colors and situation.

Well, after almost losing my mind with this, I have to admit that I learned LOTS !!!

- I used a pattern style of transfer from sketch to board.  I copied the sketch on printer paper and started cutting each shape as a pattern and copied it on the board.  This was helpful as I always lose proportion when doing this without any help.


- I learned bits more of human anatomy.  And it is the first actual foot I ever paint that looks acceptable! (hey! I must celebrate small victories, right?)

- I painted a Dragon!!!  (Hubby's favorite part)


- I learned a lot of suggesting textures on oil painting.  The scales were fun to do!

- From the beginning to the end, I kept her story the same. She's not afraid of the dragon, as she's the one who's protecting him.

- It actually has a story! =D   


"The Dragon's Keeper"
Oils on Canvas Panel
11"x14"
2014

Purchase info directly with dianitaarts@gmail.com


After reading and listening to 2 podcasts during my daily walks, I really felt more comfortable taking chances.

This podcasts are:

Create & Inspire  by  Aunia Kahn


Art Marketing Action  by Alyson B. Stanfield  (sadly, it's not updated anymore, but the podcasts that remain are sooo good!)

I hope you enjoy this blog entry, please, let me know in the comments if you have any question, or suggestion. Please, be polite! I know I'm always learning new techniques!
Have a wonderful week!


Thanks for watching!


Dianita


Feb 13, 2014

WIP Photos of latest painting - Fotos del proceso de mi última pintura

ENGLISH: Back in December, a friend of mine asked me for a painting of a horse running in the beach. She liked the painting I was making back then, but she wanted something bigger and with sunset colors. 

I began searching for references and inspiration and started working on it. I lost some pics of the process, from the start to mid-point, but I'm sharing here some of the detailing shots.


ESPAÑOL: En diciembre, una amiga mía me preguntó si podía hacerle una pintura de un caballo corriendo en la playa. A ella le había gustado una pintura que estaba haciendo en esos días, pero quería algo más grande y con colores del atardecer.

Inicié buscando referencias e inspiraciones para comenzar a trabajar en la imagen. No encuentro más fotos del proceso, especialmente desde el inicio hasta la mitad =(, pero les comparto unas fotos del proceso de detallado.


Colors blocked/ Colores bloqueados:


Adding some shine to the coat:


By this point, I asked my friend Tamisery for her opinion on this painting so far, and she pointed out some technical issues that I tried to fix in the best way I could  (like the horizon line that has to go a bit up than where I did it =|)  and that I had to make a choice with the perspective of the horse)

With her advice, I moved forward and then it became again something a bit more logical for me. 
En este punto, le pedí su opinión a mi amiga Tamisery , ella me comentó que veía algunos problemillas técnicos que traté de corregir de la mejor manera posible (por ejemplo: la linea del horizonte, que debía ir un poco más arriba de donde inicialmente estaba =|  y que debía tomar una decisión sobre la perspectiva del caballo)

Con su consejo, pude avanzar con mejor paso porque, al fin, la imagen tomó un poco más de sentido para mí.


 More detail on coat (water line already placed above of original line)/
Más detalle en el pelaje ( la línea del agua ya corregida)


A bit shadowy  =(  I use to paint at nights when I'm at my parent's house to avoid noise or the eventual favor that steals most of the day.

Esta foto salió un poco oscura =(  Normalmente pinto en las noches mientras estoy en casa de mis papás, para evitar ruido y el eventual favor que hay que hacer que consume todo el día =|


My first attempt with water splashes, first time working on something like this, I was absolutely terrified

Mi primer intento con las salpicaduras en el agua, es la primera vez que hago algo así, estaba aterrada


And, after thinking about it, I did some more work to it, because it wasn't quite convincing for me yet.  I searched for more reference images and then, to hold my breath and make the changes

Y, luego de pensarlo un rato, seguí trabajando en esa zona, porque aún no me convencía. Busqué más imágenes de referencia y así, casi casi conteniendo la respiración, me puse a hacer las correcciones


 And well, this is the finished image before taking it out for a more formal photo.  I was quite happy with the water, it added the movement I wanted to portray =)

Esta es la imagen terminada, antes de llevarla para afuera para una foto más formal. Estoy bastante satisfecha con el agua, le añadió un poco más del movimiento que quería agregarle =)


This is the finished image, photo taken with my lovely camera. It was a bit of a cloudy day, but it showed lovely.

Esta es la imagen final, fotografía tomada con mi adorada cámara.  Estaba un poco nublado, pero me gustó mucho como salió.


The image is 90cm x 70 cm, Oil on Canvas.  Not for sale.

La imagen es de 90cm x 70cm, Oleo sobre tela. No está a la venta


Thanks for watching!
Gracias por su visita!

Feb 8, 2014

Year of the Horse... Very fitting! 2 new paintings!


I just finished 2 paintings for a friend, who, in exchange for them, got me in to a wonderful workshop from David Alonso, owner of "Brio Natural", a technique that reminds me to Pat Parelli's method of Natural HorseManShip  <3

It was an amazing experience, and well, I paid it with art. So I couldn't be happier !

I'm making 5 paintings for him. 3 of them are delayed ones I promised him a long time ago and 1 new one that was in progress when we agreed on it and an original ACEO card.

The first one I want to show is this:

"In the beach"
Oil on Canvas
50cm x 40cm
2014

It's my FIRST painting completely based on a photograph, I'm quite proud of it. I still need to learn more of landscapes, but to be the first, I think I nailed it!


And my 2nd one

 
"Mezcalero"
Oil on Wood
Around 33cm diameter.
2014


Based on a photo I took of one of my friend's horses.
I've received lots of visits to this photo on FB, almost 490 in 2 days! It's a big achievement for me =)

I'm so happy I'm finally being able to close cycles on pending stuff.

Well, that's it for today.

Happy New Year and lots of love and health and prosperity for this new year that just started.
Thanks for watching!

Dec 3, 2013

Horse #2 Aceo Process


Hi hi, how are you all doing?
This might be my first time posting the process pics of a piece I've made, this isn't by all means a "This is how you do it" kind of tutorial. I'm still learning lots of tips and ticks for doing what I love to do, so I really hope you enjoy the pics =)

This is the finished piece:


It's one of my recent ACEOs (Art in 2.5" x 3.5" surfaces), I started creating this to save some money for a Natural HorseManShip workshop that will take place on Dec 13-14 on the riding club I attend. I was very lucky, because I made a trade with a friend, so I'll be attending this workshop in exchange of art (Isn't it sweet??) , so this ACEOs will still be created and will be available for sale  =)

For this ACEOs, here's what I'm using:

2.5" x 3.5" (handcut) Cold Press Watercolor Paper (140lb)
Grumbacher Academy Acrylics (Yellow Ochre, Thalo Blue, Mars Black, Cadmium Yellow, Hooker's Green)
GOLDEN Artist Color (Burnt Sienna, Titanium White, Naples Yellow Hue, Burn Umber)
Prismacolor Premier Pencils (White, Black)
Prismacolor Scholar (White)


And I'm using this stunning Raphael Macek's Photograph as inspiration


So, I start by doing the pencil work on the tiny card.  I decided to photograph the process after this, so no pics, sorry =)

Then, I check light and dark areas and start applying a very diluted layer of burnt umber. (Main shadow areas are the eyes and nostrils)


That pencil is my ACEO holder !  It's easier to handle it without messing with the wet paint =)
I keep applying light washes of burnt umber to start defining some areas and trying to get even soft shadows in place.


 More Shadow/Light defining


I start playing with new light washes and quickly taking them off with a Qtip, this gives me a lovely textured effect on the face and neck.


I got a bit worried this guy is looking too flat, so I started playing with Thalo Blue to add depth to the darker spots (eyes, nostrils and some shadows on hair and ears) And I start working a bit on bringing the muzzle out.


 I keep working with mixture of thalo blue and burnt umber, with some hints of burnt sienna. As well as some white to start defining light areas.


 I kinda got bored and started a blue wash on the bg xD  More tiny texture areas added


You'll get bored with the almost non-sense serie of photos without any big change on it.  What was happening was a bit more of shadow and texture definition.


There's some point in the process where I still feel some depth missing. So I started adding some black washes to the darkest areas and start adding very very light washes on areas with texture or where other color should be predominant.


 Working on the mane, again, very light washes of white or burnt umber, depending on the areas.
I also use White and Black Prismacolor Premier pencils to define a bit more the hair area.  The White Prismacolor Scholar pencil I use for softening a bit the lighter areas on the neck. This pencils are harder than the premier, so I love to use them for blending.


More defined hair:


Ok, here's a big change. 
I was going for a plain background, but Iwasn't still happy with the texture of the horse. The white horses I draw/paint tend to show more texture, and the white-ish background was not helping me with it. So to my eyes, it looked somewhat unfinished, so, on a crazy Leap of Faith, I decided to add a blurry background. Inspired on another photo I was looking at for color reference (original photo is monochromatic). 

So, here it is with a background:


 I worked on the blurry bushes, and lost hair detail. So, I worked on the hair again. I feel safe because I really love how this change on the background helped this horse to pop out a bit more.


And here it is, as you can see, I added a biiit of green on the darker area on the top right corner. This was to help with composition.


As you can see, I don't do much different from other Acrylic artists. I'm not a hyper realism artist, but I like to try some realism from time to time, mostly with horses. They're not perfect, but they're mine... And as long as they don't look like dogs (long story involving my mother), I'm very happy with them hahaha  

Horse ACEO#2 is currently for sale at:  http://artbydianita.storenvy.com/products/12539181-horse-aceo-2


This is the first ACEO I made, and it's currently on hold.


I hope you enjoy this little process, if you have any question, please let me know =)

Thank you for watching!

Dianita ^^
www.artbydianita.com
My Facebook page